Starting a search
Text strings can be searched for in the Workbench as follows:
- In the Workbench toolbar, click the search button
 .
.
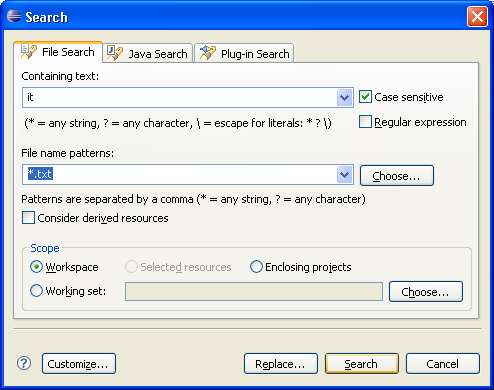
- In the Containing text field, type in: it
The combo box for the Containing text field also displays a list of
recently performed searches to select from.

- The Case sensitive checkbox can be selected or deselected depending
on whether or not a case sensitive or insensitive search is to be performed.
You can also select the Regular expression checkbox to enable more powerful searching
capabilities. To see what is available in regular expression mode, you can hit
Ctrl-Space over the text field to get content assistance that lists the possibilities.
For this example, just check the Case sensitive box to search for lowercase
"it".
- The kinds of files to include in the search can be specified in the File
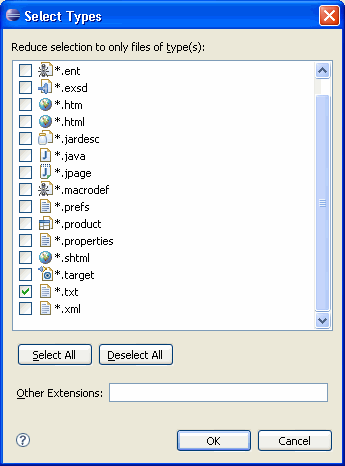
name patterns field. Click Choose... to open the Select Types dialog.
This dialog provides a quick way to select from a list of registered extensions.

For the moment, the search will be confined to .txt files. Ensure *.txt is
checked and click OK.
- In the Scope field, specify the files and folders to include in the
search. The choices are: the entire workspace, the currently selected resources
in the Workbench, or a working set which is a named, customized group of files
and folders. Leave the scope as workspace.
- Use the Customize button to choose what kinds of searches are available
in the dialog. This setting may be left unchanged.
- Click Search. At this point, the Search view will be made visible,
and it will begin to fill in with the results of the search. The stop button
in the Search view can be clicked to cancel the search while it is in progress.
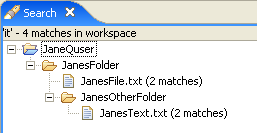
- Observe that the Search view displays:

The next section will describe how to work with the Search view.
 .
.
 .
.